Sunday, November 13, 2011

Lemon Dill Chicken Skewers and Roasted Red Potatoes

So, I had a ton of wooden skewer sticks left over from the kids birthday party fruit kabobs that I made, so I searched for a easy way to put the leftover skewers to good use....plus, I felt like grilling! I found this recipe for the lemon dill chicken on this site www.savorysweetlife.com . This blog has some amazing recipes, and they all seem pretty simple and easy....beautiful pictures too!

I've heard you're supposed to soak the wooden skewers in water prior to grilling to keep them from burning....so I did, for about 30 minutes. They still got pretty charred from the grill, and a few actually broke it half, but all was well, because the chicken came out perfectly. I served this with roasted red potatoes (recipe to follow) and some cheesy cauliflower...yummy! The kids actually loved this chicken too! They, of course, dipped theirs in ketchup. Kevin and I ate the chicken by itself, but if I make these again, I want to find a good dipping sauce to go along with the chicken. This is the perfect meal to sit out on the patio, balcony, deck, or whatever you have, and enjoy your dinner in this beautiful weather....because it won't last long!

Lemon Dill Chicken Skewers

You will need:

-2 lbs boneless, skinless chicken breasts ( I actually bought about a pound and a half of chicken tenders...they were easier to cut into chunks)

-2 tablespoons olive oil

-juice from 1 large lemon

-2 teaspoons dried dill

-1 1/2 teaspoons kosher salt

-1/2 teaspoon ground black pepper

-wooden skewers


*Heat grill to med-high heat.

*Cut chicken into 1 inch cubes and place into a bowl.

*Add olive oil and lemon juice to chicken and begin massaging chicken with your hands for 30 seconds

*Add dill, salt, and pepper to chicken and continue massaging for 30 more seconds.

*Skewer 6-8 pieces of chicken on each stick. Carefully pour some olive oil onto some paper towels, and using tongs, grease the grill with the olive oil soaked paper towels.

*Place chicken skewers on the grill and cook for 10 minutes, turning over once halfway through (5 minutes on each side)


Here's my favorite way to do roasted red potatoes....these are so easy and soooo good. They are a perfect side for any dish and require very little time or effort. And did I mention that they are crispy? That's the best part:)

Roasted Red Potatoes with Rosemary and Garlic

You will need:

-a few pounds of small red potatoes, washed well

-extra virgin olive oil

-kosher salt or sea salt

-ground black pepper

-garlic salt (I used a garlic sea salt grinder), either one would work

-3-4 sprigs of fresh rosemary, cut and chopped up finely


*Cut potatoes into halves and then quarter them. Put potatoes into a large bowl and drizzle on a good amount of olive oil. Generously add the salt, pepper, garlic salt. Sprinkle in the rosemary, and toss with your hands to combine everything. Spread potatoes out on a foil line baking sheet and bake on 425 for 20-25 minutes, until potatoes are slightly golden and crispy. Sprinkle with a little remaining kosher salt when they come out of the oven. Enjoy!


Monday, November 7, 2011

Pioneer Woman's Perfect Pot Roast and Ultimate Mashed Potatoes

I made this meal several weeks ago, and am just now getting around to posting it. If you are looking for a perfect roast recipe, then this would be it in my book! I'm pretty sure I dreamed about this roast for a few days afterwards. And the mashed potatoes were just as good, definitely not low in calories, but amazing and so worth it. I pretty much followed her recipe exactly, except that I didn't have fresh thyme so I left it out. She also gave the option of using either red wine or beef broth, and I chose to use all beef broth. She used a large dutch oven that could go straight from the stovetop to the oven....I don't have one of these so I opted to transfer the roast and beef stock with veggies to a roasting dish when it was time to put in the oven, and it worked just fine. If you are having guests over and want to impress them, or just want to impress your husband then this is the dish to make!


Pioneer Woman's Perfect Pot Roast


You will need:


-1 chuck roast (mine was right around 4 lbs.)


-2 tablespoons olive oil


-2 whole onions (I used yellow onions)


-6 whole carrots


-salt and pepper (I used kosher salt)


-1 box beef broth


-3 sprigs fresh thyme


-3 sprigs fresh rosemary


*Generously salt and pepper the roast.


*Now prep your veggies: Cut the 2 onions in half and peel off the outer skin. Then, cut the carrots into 2 inch pieces. (I didn't peel them, just wash them off really well)


*Heat 2 tablespoons olive oil in a large skillet over med-high heat (I think I added a tablespoon of butter too). When the oil is very hot, add the halved onions and brown them on all sides, then remove them and set aside on a plate.


*Now throw the carrots into the hot oil (be careful because it will splatter) and brown for 1 or 2 minutes, then remove to a plate with the onions


*Now brown the roast: if needed add another tablespoon of olive oil to the skillet. Place the roast in the skillet and sear it for about a minute on all sides until it is nice and brown. Remove the roast to a plate.


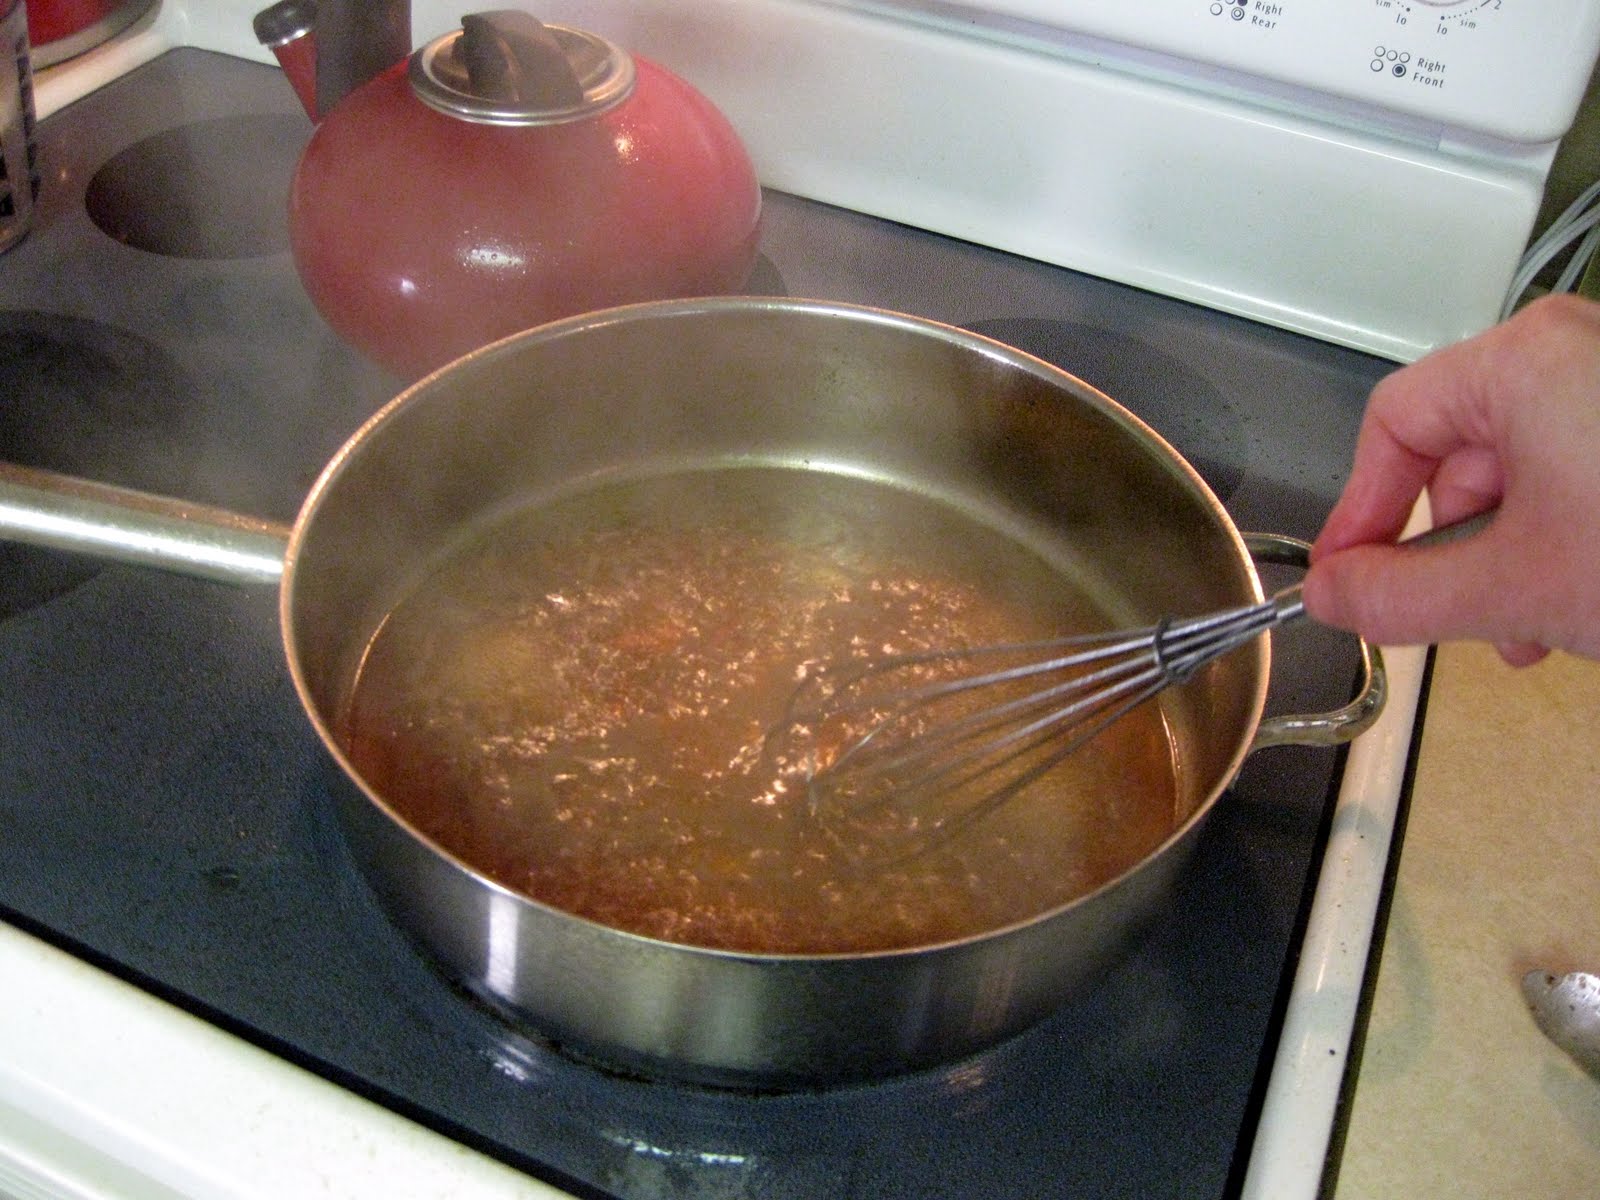
*With the burner still on high, pour in 1 cup of beef broth to skillet and whisk the bottom of the pan to remove all the browned bits and drippings (this is deglazing). Just whisk for a minute or so.


*Transfer roast to a roasting dish and carefully pour the beef broth from the skillet over the roast. Then pour the remaining beef broth from the box over the roast. Add in the carrots and onions and sprigs of rosemary and thyme.


*Put the lid on the roasting dish and roast in a 275 oven for 3 to 3 1/2 hours.


Here's where it gets really good. Go the extra step and make these. They are kind of labor intensive, but so worth it.


Mashed Potatoes


You will need:


-5 lbs. russet or yukon gold potatoes (I used a whole bag)


-3/4 cups butter, softened


-8 0z cream cheese, softened


-1/2 cup half and half


-1/2 teaspoon to 1 teaspoon lawry's seasoned salt


-1/2 teaspoon black pepper


*I also added a little bit of garlic salt


*Peel and cut potatoes into pieces, make sure they are close to the same size so they will cook evenly


*Bring a large pot of water to a boil and cook potatoes about 30-35 minutes until tender and fork will easily slide into the potatoes.


*Drain potatoes, then add them back into the dry pot on the stove. Mash potatoes over low heat to allow steam to escape and then turn off the stove.


*Add butter, cream cheese, and 1/2 and 1/2, and mash well with a potatoe masher.


*Next season with seasoning salt, pepper, and garlic salt if desired.


*I think I added a little butter to top it off


You can make these ahead of time if you need to and bake them to reheat them. Honestly these don't even need gravy they are so good, but we used the leftover gravy from the roasting dish and it was awesome. I can't wait to make these for Thanksgiving!


Tuesday, October 18, 2011

Raspberry Spinach Salad with Grilled Chicken

I figured I'd take a break from my obsession with Pioneer woman recipes, and post one of my own for a change! I wouldn't really consider this cooking, more like throwing stuff together to make a good salad....a really good one. Kevin and I have been eating this salad for years now, at least every few weeks. We started out eating the salad by itself, and then added grilled chicken to it, which makes it a perfect meal! The key ingredient to this is Ken's Steakhouse Lite Raspberry Walnut Vinaigrette salad dressing. It goes perfectly with the spinach and ranch dressing, if you can believe that. I know, raspberry vinaigrette and ranch dressing together? It really is good, I promise! Personally my favorite part is the crumbled goat cheese...when you add the grill chicken and toss it all together, the cheese kind of melts together.... it's so good! For the chicken, we usually just salt and pepper it and throw it on the grill....but we've also cooked in a little olive oil in a skillet on the stove if we didn't feel like messing with the grill. Or you can always use a george foreman grill if you have one...not quite the same though with chicken. I also like to add slivered almonds to add some crunch to the salad, but you can add croutons too...or just leave it plain like Kevin does:) You will need:


-1 bag of baby spinach leaves


-cherry tomatoes, halved (use as many as you like)


-2 grilled chicken breasts, cut into bite sized pieces


-Ken's Lite Raspberry Walnut Vinaigrette Dressing


-Ranch dressing (I use Kraft Buttermilk Ranch)


-salt/pepper


-crumbled goat cheese ( I used Alouette)


-bag of slivered almonds if desired (find them above the salads in the produce section)


In a large bowl, combine spinach, tomatoes, grilled chicken, and goat cheese. Sprinkle a little salt/pepper to season. Drizzle on Raspberry Vinaigrette to your liking. Then drizzle the Ranch dressing to your liking. Toss to combine all ingredients and top with slivered almonds if desired! **Be careful not to add too much dressing at first, you can always go back and add more, but it's hard to take it away if you overdress it**


Thursday, October 13, 2011

Chicken Bacon Ranch Panini

Here's another recipe from Pioneer Woman...... I think I am seriously obsessed with the recipes on her blog now. I made this panini tonight for dinner and I can't even adequately describe how good it was. Kevin and I both took bites of it and just sat there without speaking for a second...I've never thought a sandwich would leave me speechless, but it did. It was that good. The ingredients are so simple too. I don't have a fancy panini maker, and didn't feel like "pressing it down in the skillet", so I busted out my trusty george foreman grill and it worked perfectly! You'll need a loaf of french bread for this sandwich...I got a loaf from the bakery at walmart for $1.49. Don't get a long skinny loaf, look for the biggest, fluffiest one. I used half for these sandwich's, and the other half to make garlic bread for last night's dinner so it didn't go to waste. I also opted to use the precooked bacon...oscar mayer brand. This was a first for me...I honestly have never microwaved bacon before and was kind of leery of it, but decided to try it because I knew it was a weeknight and I wouldn't feel like frying bacon at the end of the day. It was actually really good, I just popped it in the microwave for 40 seconds and that was that! It's definitely not better than bacon done in a skillet, but for a sandwhich topping it was perfect. The ingredients below made enough for 3 paninis, which was perfect for our family, but you can easily adjust to make more or less.


Chicken Bacon Ranch Panini

You will need:

-loaf of french bread, thinly sliced (I used 6 slices and saved the rest of the loaf)

-spicy mustard (I used kroger brand spicy brown mustard)

-ranch dressing (I used Kraft buttermilk ranch)

-block of sharp cheddar cheese, thinly sliced

-8 strips of bacon (I used pre-cooked oscar mayer)

-2 chicken breasts

-3-4 tablespoons butter, softened (I used real, salted butter)


*First prepare your chicken. You'll need to thin out your chicken breast by either pounding them with a mallett or "butterflying them". I chose to butterfly them. Just lay the chicken breast on the cutting board and make a horizontal cut almost all the way across the center of the chicken. Then, get your pan hot. I added about a tablespoon of the butter along with a few tablespoons of canola oil over med-high heat. Once the pan is hot, fry the chicken breasts for about 10 minutes (5 minutes per side) or until cooked through. (I salt and peppered them a little when they were in the pan.) Remove chicken from pan and thinly slice them up.

*Now get the bread ready. On one slice of bread spread a generous amount of spicy mustard...on the other side spread a generous amount of ranch dressing. On top of the mustard side, pile on the chicken, sliced cheddar cheese and bacon. Top with ranch dressing side and smush down a little with your hand so the sandwich sticks together and everything doesn't fall out. Meanwhile, get your george foreman or panini maker nice and hot.

*Next, spread the remaining softened butter on outside of each piece of bread and toast until golden brown and delicious. Enjoy!

Doesn't this look good? And yes, I have weird thumbs:)


Sunday, October 2, 2011

"Egg in a Hole"

Ok, I just have to post this too. Last Saturday I was watching my recording of Pioneer Woman, and she did her version of "egg in a hole". I have never seen it done before and told Kevin how easy and good that looked....I didn't really think he was paying attention. The next morning before church I got up and was surprised to find this when I went into the kitchen!

His version of "egg in a heart" I guess. How sweet. I just love the fact that he can cook awesome breakfast food, because it is just not my thing. I'm always too tired to put forth much effort. Anyway, these little treats were perfect for a fast/easy breakfast, and the kids loved them, especially the toasted hearts! This will definitely make a repeat on our breakfast menu soon!


You will need:

-Bread, white or wheat (we used whole wheat)

-butter (about a tablespoon, maybe more)

-eggs

-salt/pepper


*Cut out a hole (or heart in our case) with a cookie cutter or rim of a glass.

*Melt butter in skillet over med-low heat until completely melted

*Place bread into skillet and crack egg right into the hole. Don't move the bread for about 30 seconds

*Sprinkle egg with salt and pepper. Then after about a minute, flip over with a spatula

*Sprinkle the other side of the egg with salt and pepper and move the toast around so it will soak up the butter

*Let it cook until the yolk feels soft to the touch

*Don't forget to throw in the cut out hole (or heart) into the butter to get toasted too...it's the best part!


Malted Milk Chocolate Chip Cookies

If you read our family blog, you will already know my new obsession with the Pioneer woman. She made these cookies on her show the other day and they looked so good I had to try them. Since the boys were on their little hunting trip, Hannah and I made a trip to the store for the malted milk powder (I found it where the chocolate milk mix stuff is...Nestle, ovaltine, etc.) and chocolate chips. She was so excited to get to be my only helper this time. Usually Hunter tends to dominate the kitchen stools when I cook, so it was a nice change.


These cookies were amazing. The milk chocolate chips and the malted milk powder really made the difference. If you like chocolate malts, you will like these cookies. Unfortunately, I didn't have my camera to capture just how good they were because Kevin had it:( Oh well, guess I will have to make them again:) Here's a link directly to her site, I followed her directions exactly, but she goes into a lot more details and has pretty pictures http://thepioneerwoman.com/cooking/2010/06/malted-milk-chocolate-chip-cookies/


The Pioneer Woman's Malted Milk Chocolate Cookies


You will need:


-1 cup (2 sticks) unsalted butter, softened


-3/4 cup golden brown sugar


-3/4 cup sugar


-2 eggs


-2 teaspoons vanilla extract


-2 cups all purpose flour


-1 1/4 teaspoon of baking soda


-1 1/4 teaspoon of salt


-1/2 (rounded) cup of malted milk powder


-1 bag (12oz) milk chocolate chips **don't use semisweet, get the milk chocolate!


*Preheat oven to 375


*With your mixer cream the butter, then add both sugars and cream until fluffy. Add eggs and beat slightly, then add vanilla and beat until combined. Add malted milk powder and beat until combined.


*Sift together flour, baking soda, and salt. Add slowly to butter mixture beating until just combined


*Add chocolate chips and stir in gently


*Drop by teaspoonfuls, I used an ice cream scoop, onto foil or parchment lined baking sheet


*Bake for 10-14 minutes. Shorter if you want chewy, longer if you want crispy


*Make sure and leave enough space between the cookies...these cookies spread out and become really flat, so you will probably have to do 2 batches. I did one chewy batch and one crisp batch, and liked them both! Also after baking them, leave them on the baking sheet for a few minutes, then transfer them (foil and all) to a wire rack to cool. This way they will cool down and stay moist. Make sure and have a glass of milk on hand...you will need it:)


Sunday, September 18, 2011

Buttercream Icing

I decided to do cupcakes instead of a cake for the kids birthday party this year, and was surprised to discover and easy and fun making icing was. I'm not sure if it's because I've been watching too many cupcake shows on TLC, or the fact that I was trying to save a little money where I could, but I decided to try out making buttercream icing. I decided to do a practice batch about a week before the party, because I wasn't sure how it would turn out. I was hoping to make the icing red, so I bought red food gel to tint the icing...it didn't work, but I did figure out how to make a pretty pink shade. For the party I decided to keep it plain white though (the vanilla in it actually makes it kind of off -white shade).

Three things I discovered: making your own icing is cheap, easy, and sooo worth it. Seriously, I could probably just eat spoonfuls of this stuff and go into a sugar coma. This recipe is for vanilla buttercream, but you can easily change it up by using almond or lemon extract in place of the vanilla, or adding cocoa powder for a chocolate buttercream. I used a ziploc bag and pastry tips to pipe the icing on the cupcakes. The two tips I used were the star tip, and the large round tip. You can find them at any craft store for about 25cents a piece. Piping the icing is the fun part....I think I preferred the star tip because it was faster, and didn't show as many flaws. I'm pretty sure this will work well for cakes too, but I haven't tried yet.


Tips:

-make sure your butter is REALLY soft before you start, let it sit out on the counter for an hour or so until its pretty mushy, don't microwave it


-sift the powdered sugar before using it....it will take out any clumps


-after you finish the icing, stick it in the fridge for 10-15 minutes to let it firm up....it will hold up better when you pipe it


-if icing is too runny, just add more powdered sugar....if it's too thick, just add more milk


You will need:

-1 cup (2 sticks) UNSALTED butter, softened

-4 cups powdered sugar, sifted

-1/4 tsp salt

-1 tablespoon vanilla extract

-2-3 tablespoons milk or cream (I used whole milk)


*Beat softened butter with a mixer on medium speed for about 1 minute until completely smooth

*Add salt

*One cup at a time, add 2 cups of powdered sugar, beating after each addition

*Add vanilla and beat to combine

*Add 1 tablespoon of milk, and continue beating

*Add remaining 2 cups of powdered sugar, one at a time

*Add an additional 1-2 tablespoons of milk and beat until desired consistency is reached. It should be nice and thick. Continue to beat another minute or so to get any air bubbles out. At this point I put it in the fridge for 10-15 minutes to stiffen up before piping it. To pipe the cupcakes, cut the tip of a large ziploc bag off and insert the pastry tip. Fill ziploc with icing and squeeze until it comes steadily out of the tip. Swirl or pipe, or whatever makes you happy. Then eat one, or two....or three:)

Here's my practice round, I let the helpers lick the beaters after we were finished


this is about what it should look like...this is the point where I actually stole a few spoonfuls


my attempt at a swirl, this is using a large round tip


this is using the star tip...much faster


birthday party cupcakes


and here's an easy recipe for the party punch, I used hawaiian punch to go along with the luau theme....it was really yummy


*2 large containers of strawberry lime hawaiian punch

*several lemons and limes, sliced

*1 bottle lemon-lime soda


Mix everything together in punch bowl and add ice